10 GEOVIA Surpac Plotting Tips & Tricks 6-10
Continuation from 1-5 Plotting Tips & Tricks
by Froiland Timpoc, EM
These are quick and simple GEOVIA Surpac Plotting Tips & Tricks. We also incorporated some common questions or queries from our clients that are important to others. Let’s start!
Plotting Tip & Trick #6: PLOT HATCHING
Solution:
Create an entity for hatching
Solution:
For Autoplot: Go to Set drawing styles form (SSTR), nominate this entity on the Entity column of the desired strings to be hatched. Plot using Autoplot.
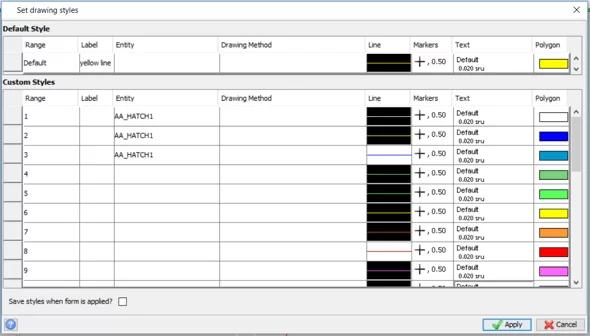
For File-based plotting: Go to Plotting -> Map -> New, input the name of the map, then nominate the entity, source file, and strings to be hatched.

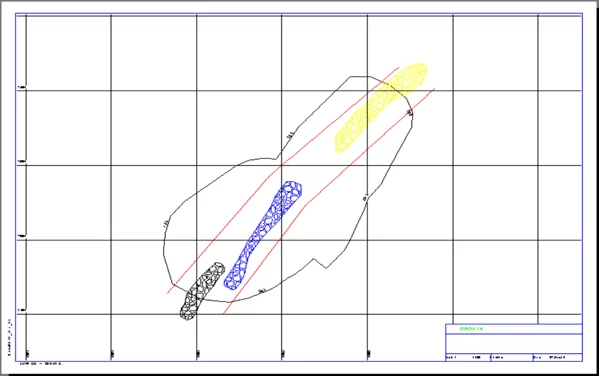
SAMPLE PLOTS IN SCALE:
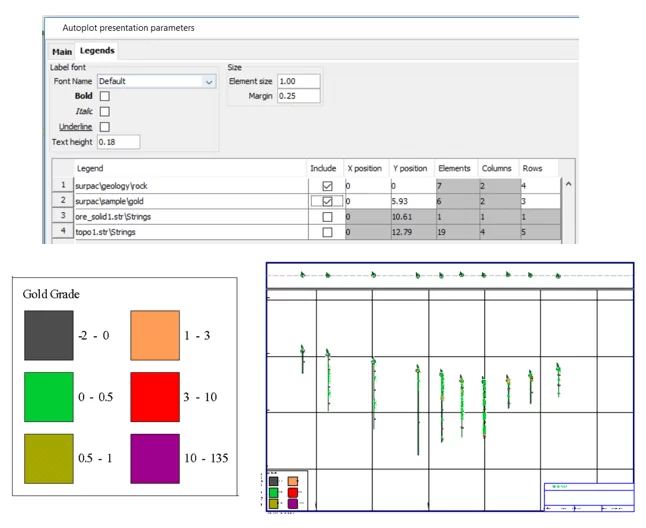
Plotting Tip & Trick #7: LEGENDS ★ ★ ★
Having a hard time creating legends and tables on plot files?
MAP LEGEND
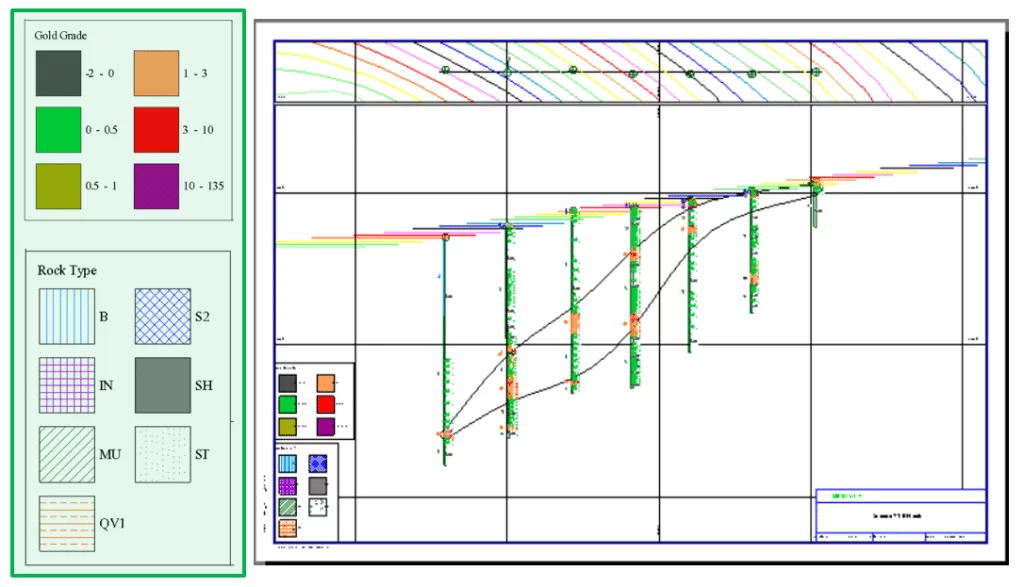
Solution:
For Legends:
- Upon plotting using Autoplot, go to Legends tab.
- On the Include row, mark the Legends to be incorporated.
- Click Apply.
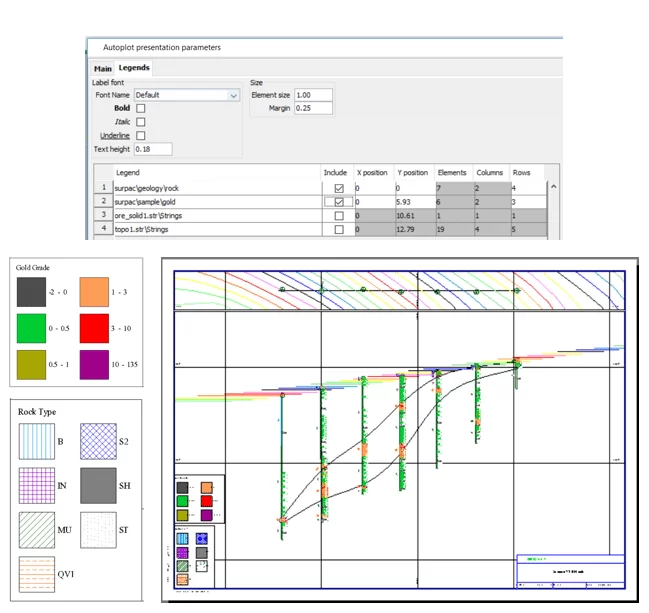
For Tables:
- Upon plotting using Autoplot, go to Legends tab.
- On the Include row, mark the Legends to be incorporated.
- Click Apply.
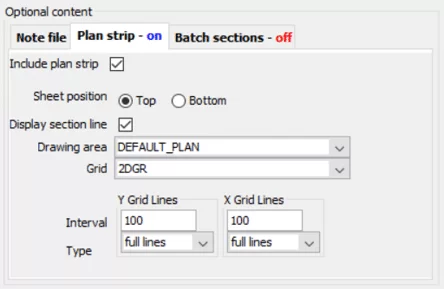
Plotting Tip & Trick #8: SECTION W/ PLAN STRIP
Plotting section maps with plan strip on the same sheet?
- Open Surpac, load the necessary files (e.g. drill hole database, strings, DTMS, etc.)
- Go to Plotting -> Autoplot
- Under Optional Content -> Plan Strip
- Check ‘Include Plan Strip’, then fill necessary details
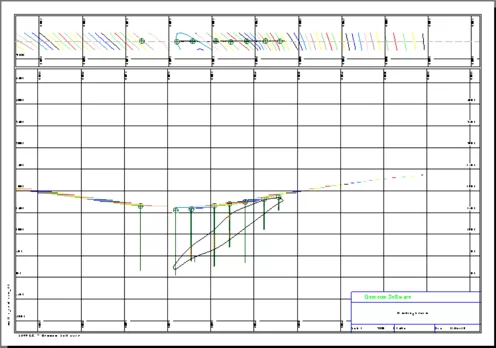
SAMPLE SECTION PLOT WITH PLAN STRIP:

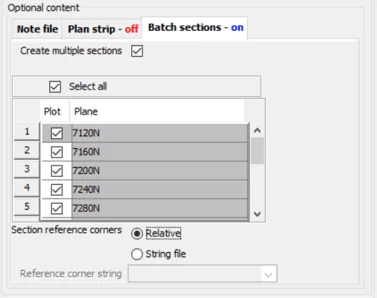
Plotting Tip & Trick #9: BATCH PLOTTING
Solution:
- Open Surpac, load the necessary files (e.g. drill hole database, strings, DTMS, etc.)
- Go to Plotting -> Autoplot
- Under Optional Content -> Batch sections
- Check ‘Create multiple sections’, then select desired sections to be plotted.
BATCH PLOTTING OUTPUT:
Plotting Tip & Trick #10: SAVE MAPS IN PDF
Having the need to save maps in Portable Document Format or PDF? Here’s the trick.
Solution:
- Make sure the machine has a PDF software.
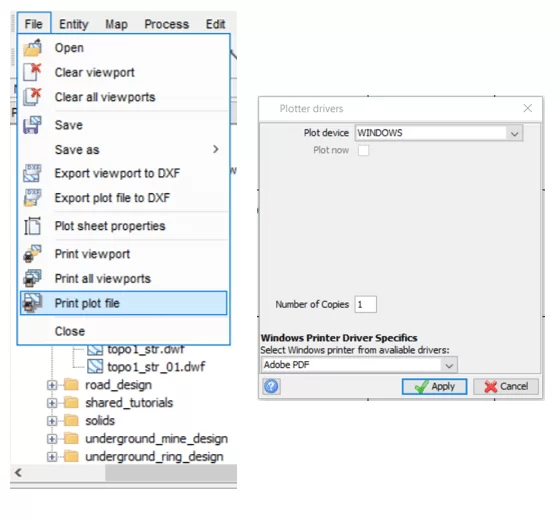
- Open Surpac, go to Plotting -> Plotting window
- On Plotting window, go to File -> Print plot file, then select the plot file
- Select WINDOWS as Plot device
- Select the ‘PDF software’ as the windows printer driver. Click Apply.
That’s it! We hope this helped you 10 GEOVIA Surpac Plotting Tips & Tricks. For more information, check out Paramina‘s website