Deviation Analysis: Analyzing The Difference Between Designed and Actual Models
In mining operations, it is normal that actual excavations may sometimes deviate from the designed model.
To ensure the efficiency of operation, it is very critical to ensure that the deviation is within the acceptable tolerance.
This function will help you monitor the deviation between solids or surfaces visually. This can be useful if you want to compare designed and “as mined” underground drives or surface excavations.
To run this function: Choose Surfaces > Mesh tools > Deviation Analysis, or Solids > Mesh tools > Deviation Analysis , or…
- In the Function Chooser, type MESH DEVIATION ANALYSIS and press ENTER. NOTE: At least 2 objects are required in graphics before this function can proceed
We have the “Designed” and “As-mined” pits in this example.
Figure 1. Designed Pit
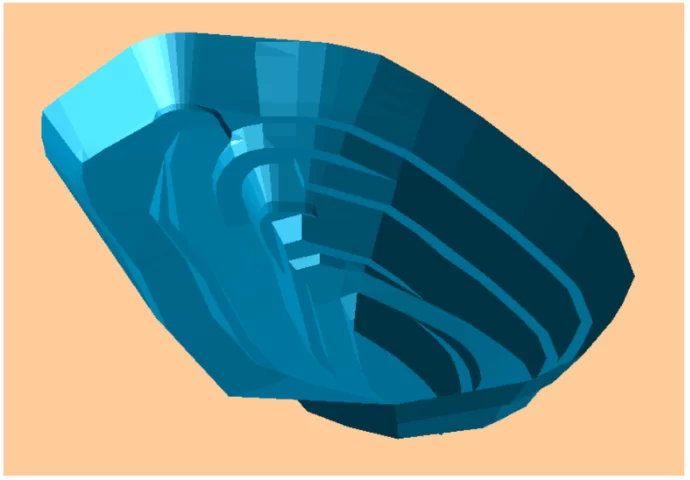
Figure 2. “ As mined”(Actual) Pit
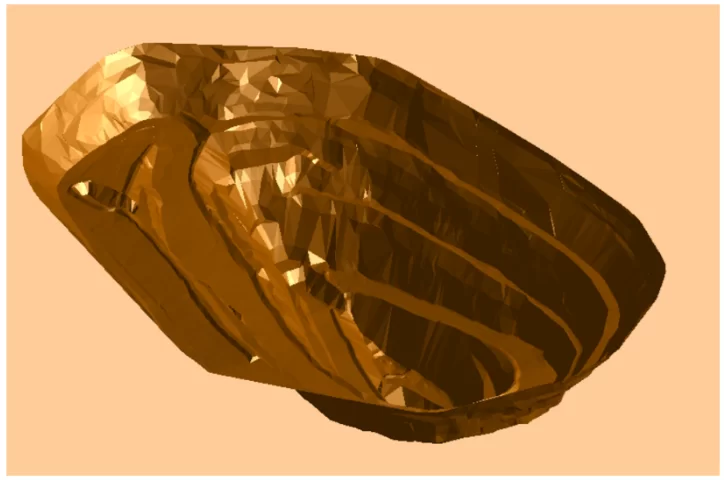
Figure 3. Designed and Actual
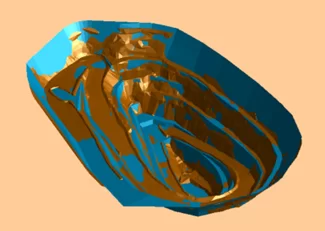
Surpac will command you to select the base object, which is the actual pit, followed by clicking the designed pit.
Figure 4. Deviation Analysis Form
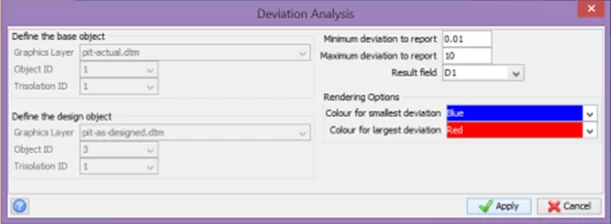
You will need to nominate a minimum and maximum deviation and a description field where the deviation values will be stored.
It will determine the minimum distance between the vertices of two objects and then displays the difference as a colored “heat map”. The heat map is a graded display of five colors, from the color representing the minimum value to the color representing the maximum value. The difference between the minimum and maximum values is divided evenly between the five colors, so that each band represents a value range of the same size.
Figure 5. Deviation Heat Map
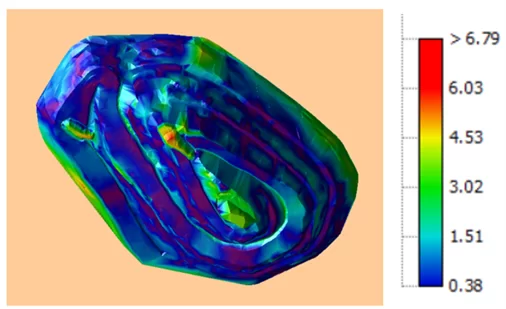
You can then save the layer of the actual pit to save the deviation values in the assigned description field.
That’s it! We hope this helped you Deviation Analysis: Analyzing The Difference Between Designed and Actual Models. For more information, check out Paramina‘s website
